Simplified Data Mastery: Creating Multiple Records and Managing Related Records with Omniscript Edit Block


In the realm of Salesforce, where data management plays a crucial role, Omniscripts emerge as a powerful ally. Among its standout features, the Edit Block proves to be a versatile tool, allowing users to effortlessly create and edit multiple records, including their interconnected counterparts. Let's dive into a straightforward guide on streamlining your data management using Omniscript's Edit Block and Data Raptor.
Step 1: Setting Up Your Omniscript
Drag the "Edit" block onto the canvas.

When we fill this form we can see data coming it's a nested structure with an object containing an array of objects.
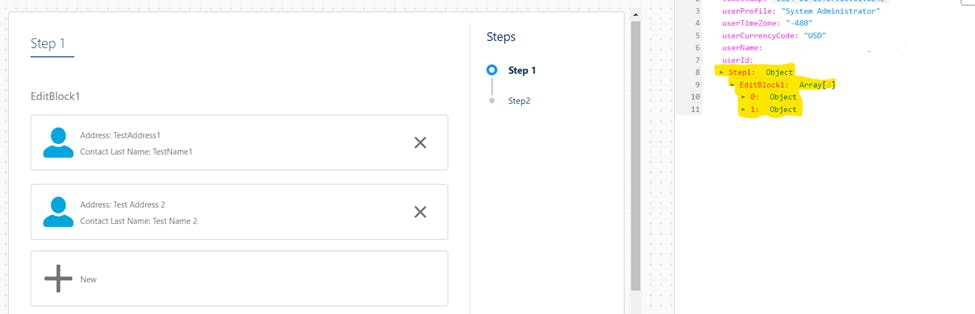
"Step1": {
        "EditBlock1": [
            {
                "ContactLastName": "TestName1",
                "ContactAddress": "TestAddress1"
            },
            {

                "ContactLastName": "Test Name 2",
                "ContactAddress": "Test Address 2"
            }
        ]
    }
Step 2: Integrating Data Raptor
Now that your Omniscript is set up with the Edit block, let's bring in the Data Raptor element.

Map the fields in DR for both object.

Now, it's time to put our configuration to the test. Execute the Omniscript.

Conclusion
In essence, the collaboration between Omniscripts' Edit Block and Data Raptor simplifies the process of creating and managing multiple records. By following these straightforward steps, you empower Salesforce users with an interface that is both intuitive and efficient. Experience streamlined data management by leveraging the capabilities of Omniscript's Edit Block and Data Raptor. Your simplified Salesforce journey starts here!